Your Post-PinPointe Laser Care Guide: How to Keep Your Shoes and Feet Fungal-Free
Have you recently received a laser nail treatment? If so, continue reading this blog because your journey for achieving clear toenails does not just stop there. Your go-to pair of shoes you put on your feet every day can host microscopic fungal spores for several weeks. You should prevent reinfecting your feet that have just been properly treated by the PinPointe laser by not putting on contaminated shoes. A thorough and disciplined hygiene and shoe sanitization routine is crucial to the upkeep of the time and money you have spent to get rid of your toenail fungus infection. Be sure to read this detailed yet straightforward guide, so you can keep your feet fungal-free and shoes uncontaminated.
The Invisible Threat Lurking Inside Your Footwear
To appreciate why post-treatment care matters, you must understand the nature of the enemy. Onychomycosis (toenail fungus) is primarily caused by dermatophytes. These microscopic organisms feed on keratin, the durable protein found in your nails, skin, and hair. When you undergo PinPointe FootLaser treatment, the laser energy penetrates the nail plate to destroy the living fungal pathogens embedded in the nail bed.
However, the laser only treats your body; it cannot treat your environment.
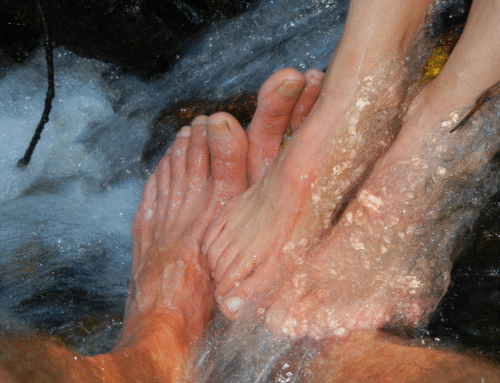
Every time you walk, your feet sweat. This moisture combines with your natural body heat to turn your footwear into a dark, damp incubation chamber. Thousands of microscopic fungal spores remain behind in the fabric lining, the foam footbed, and the seams of the insoles when you slip off your shoes. These spores are incredibly resilient and can survive dormant inside dry footwear for weeks. They wait for the next warm, moist influx of sweat to reactivate. If you step back into a contaminated shoe without proper precautions, those spores can immediately migrate back onto your newly treated nails, undoing your progress.
Understanding the cycle of reinfection is the first step toward lasting foot health. Fungal spores are highly resistant to environmental changes. They possess a rigid chitinous cell wall that shields them against simple drying out or standard cosmetic shoe deodorizers. When your foot rests inside a shoe, it sheds microflakes of skin and provides an ongoing food source for the dormant spores. Consequently, an untreated shoe remains a biological hazard for months. Skipping environmental decontamination essentially rolls out a welcome mat for the fungus to establish a brand-new colony on your vulnerable, newly cleared tissue.

Step 1: Eliminate Spores with Antifungal Shoe Spray
Prior to wearing all of the shoes you own, be sure to sanitize the inside of them. Unfortunately, the moist environment of the shoe interior that rarely gets light is ideal for fungus to live. Therefore, you must take the following protocol seriously in order to kill the fungus. Generously layer all of the inside of the shoe with our antifungal spray and let it dry before wearing your shoes. Antifungal shoe spray destroys 99.9% of fungus and bacteria on contact.
The Science Behind the Spray
Standard household deodorizers only mask odors; they do not kill fungal spores. An antifungal shoe spray uses targeted antimicrobial agents that rupture the cellular walls of dermatophytes. This neutralizes them instantly.
To maximize the effectiveness of the spray, adopt these habits:
- Spray Immediately After Removal: Apply the mist right after taking your shoes off while the interior is still warm. This allows the active ingredients to mix with the moisture before it evaporates, catching active spores early.
- Focus on the Toe Box: Tilt the shoe downward and spray deeply into the toe box. This area receives the least light, experiences the highest friction, and holds the most fungal spores.
- Treat Your Whole Collection: Do not limit spraying to your daily sneakers. Treat your dress shoes, work boots, slippers, and even seasonal footwear like winter boots or sandals. One untreated pair can restart the cycle of infection.
Consistency is key when using an antimicrobial agent. Fungal colonies can recover if the sanitization routine is sporadic. Think of your shoe spray as a daily shield. By spraying your footwear every single time you slip them off, you ensure that any newly deposited spores are destroyed before they have an opportunity to spin a new mycelial network. This direct intervention stops the contamination process right at the source, giving your toenails the clean environment they desperately need to heal.

Step 2: Implement a Strict 24-Hour Shoe Rotation
Dermatophytes breed in shoes that are worn consecutively for two days. Therefore, you need to let your shoes dry completely due to the accumulation of sweat over time.
Never Back-to-Back
Allow 24-48 hours for your shoes to dry in between uses. You can switch between pairs of shoes so you do not wear them two days in a row.
The human foot contains roughly 250,000 sweat glands, capable of producing up to half a pint of moisture every day. When you wear the same pair of shoes two days in a row, the structural materials never have a chance to dry completely out to the core. The residual dampness creates a perfect environment for fungal spores to multiply. By maintaining at least two primary pairs of daily shoes and alternating them, you break this breeding cycle through natural evaporation.
Air Out Shoe Insoles
After you take your shoes off, pull the insoles halfway out of the shoe. This increases airflow to the dampest part of the footbed.
Removable or partially glued-insoles made from foam or gel are common in shoes sold today. These materials absorb sweat like a sponge and trap moisture underneath them, right against the bottom board of the shoe. In order to create more air circulation in the shoe, you can pull the insoles up. For even faster drying, place your rotating shoes in a well-ventilated room with consistent airflow, or near a window that receives indirect sunlight. Do not place shoes in dark closets or sealed gym bags, which lock in moisture and encourage fungal growth.
For those who live in humid climates or suffer from hyperhidrosis (excessive sweating), a passive 24-hour rest period might not always be enough to dry out heavy footwear completely. In these situations, investing in an electric UV shoe dryer can offer an excellent defensive upgrade. These devices insert directly into the toe box, gently circulating warm air to speed up evaporation while utilizing ultraviolet light to further disrupt fungal DNA. Combining an active drying device with your standard shoe rotation routine provides an incredibly powerful double-layer of protection against lingering moisture.

Step 3: Upgrade and Sanitize Your Socks
The socks you wear are important because they separate your foot from your shoe. Fungus is more likely to grow with traditional cotton socks because they trap moisture in and close to your toenails.
Only Wear Moisture-Wicking Fabrics
Cotton socks? You do not need them anymore. Your skin and toenails will thank you when you invest in synthetic blends, merino wool, or copper-infused socks that actively pull moisture away.
While cotton feels soft, its fibers are highly absorbent. Instead of moving sweat away from your body, cotton holds onto it, wrapping your toes in a wet compress all day long. This keeps your nail plates soft and vulnerable to fungal invasion.
Upgrade your wardrobe with these superior alternatives:
- Synthetic Blends (Nylon, Polyester, Lycra): These engineered fibers cannot absorb liquid. Instead, they use capillary action to pull sweat away from your skin to the outer surface of the sock, where it can evaporate quickly.
- Merino Wool: Contrary to popular belief, lightweight merino wool is excellent for year-round wear. It naturally regulates temperature and can absorb moisture vapor without feeling damp, keeping your feet dry.
- Copper-Infused Socks: Copper is naturally antimicrobial. Socks woven with copper polymers help kill fungal cells and bacteria on contact, which prevents both infections and foot odors.
Wash on High Heat
Wash all socks in hot water (at least 140°F / 60°C) with an antifungal laundry additive or liquid bleach to get rid of fungus.
Fungal spores are tough and can easily survive a standard lukewarm wash cycle, transferring from infected socks to your clean clothes. To completely sterilize your laundry, you must use high temperatures and chemical sanitizers. Run your socks through a hot cycle, then dry them on high heat for at least 30 minutes. If you are washing delicate or colored socks that cannot handle bleach, use a specialized antifungal laundry rinse during the cycle to eliminate spores without ruining your clothes.
Beyond selecting the right fabric and washing at high temperatures, how you handle your dirty laundry also plays an unexpected role in infection control. Avoid tossing damp, sweaty socks directly into a dark, unventilated laundry hamper where they might sit for days. This creates a secondary breeding ground that can contaminate other garments. Instead, let your worn socks air out over the edge of a laundry basket before letting them sit, ensuring they dry out completely before going through the sanitizing wash cycle.
Step 4: Keep Feet Dry and Protected in Public
Daily personal hygiene locks in the success of your PinPointe laser treatment. Even if you sanitize your shoes properly, rotate wearing shoes, air out shoe insoles, only wear moisture-wicking socks, and wash all your socks in hot water with proper laundry additive or bleach, not protecting your feet from your environment, will get rid of all the work you put in.
Dry Between Your Toes
Intentionally dry your feet with a clean towel after they physically touch liquid, like showering or swimming. You should prevent the athlete’s foot as well by making sure to dry in between your toes.
The spaces between your toes are the narrowest, least ventilated parts of your feet. Water easily gets trapped there after a shower or swim. If you pull your socks over damp feet, you create an instant fungal incubator. Make it a strict habit to take an extra 30 seconds after bathing to dry every toe web thoroughly. If you struggle with chronic moisture or live in a humid climate, apply a light dusting of antifungal powder between your toes before putting on your socks.

Wear Shoes in Public
Never let your bare feet touch the floors in gym locker rooms, public pools, or hotel showers. Wear flip flops, shower shoes, sandals, or any shoe of your choosing in public spaces.
Public, high-moisture floors are highly populated in fungal activity. Hundreds of people walk across them daily, shedding invisible fungal spores and skin flakes infected with the athlete’s foot. Walking barefoot in these areas almost guarantees exposure. Protect your feet by keeping a dedicated pair of water-resistant slides or flip-flops in your gym bag or travel suitcase. Put them on before entering any public shower or changing area, and never take them off until you are back on clean, dry ground.
It is also important to recognize that fungal infections are highly contagious within a household. If you share a bathroom with family members or roommates, the shower floor can easily become a vector for cross-contamination. Encourage everyone in your home who exhibits signs of thick nails or scaling skin to seek a consultation. In the meantime, clean your home shower pan regularly with a chlorine bleach-based cleaner to protect yourself and your loved ones from passing fungal spores back and forth.
Understanding Your Nail Growth Timeline
It is vital to manage expectations regarding your post-treatment results. The PinPointe FootLaser works by destroying the living fungus instantly, but it does not change your existing, damaged nail structure. The clear results will appear gradually as your healthy nail grows out from the root.
On average, toenails usually grow about 1 to 1.5 millimeters per month. It typically takes 9 to 12 months for a big toenail to clear completely from the base to the free edge. This long growth cycle is exactly why your daily shoe sanitization, sock hygiene, and foot protection routines are so vital. Your new, healthy nail growth needs a clean, spore-free environment to stay protected throughout its entire journey.
During this year-long clearance period, proper nail grooming habits become your strongest asset. Always use clean, dedicated clippers for your infected nails, and disinfect them with rubbing alcohol immediately after use to prevent reinfecting your clear nails. Cut your toenails straight across rather than rounding the edges, which minimizes the risk of painful ingrown nails. If you prefer filing down thick edges, opt for disposable emery boards that you can throw away after a single use, rather than metal files that can harbor microscopic debris over time.
Additionally, pay close attention to the visual transition of your nail from damaged to clear. Over the weeks following your PinPointe laser session, you will notice a distinct line of demarcation appearing near the cuticle area. Below this line, new nail growth emerges smooth, translucent, and firmly attached to the pink nail bed. Above this line, the old, infected, and discolored nail plate will slowly push outward toward the tip of your toe. The new growth takes over completely with daily careful trimming of dead, brittle tissue.

The Role of Topical Maintenance Therapies
While the PinPointe FootLaser effectively handles the heavy lifting by clearing the active fungal infection inside the nail bed, incorporating a topical maintenance routine provides an extra layer of defense during the long regrowth period. Applying a medical-grade antifungal lacquer or clear solution along the cuticle border and beneath the free edge of the nail acts as a continuous liquid barrier. This topical layer deters any stray environmental spores from finding a footing on your healing tissue.
Think of topical treatments as a supportive daily companion to your physical hygiene habits. Applying a clear antifungal serum takes under a minute each morning, yet it keeps the surrounding skin fortified against microorganisms. This combined approach maximizes your long-term success, ensuring that external threats are neutralized from the outside while your body focuses on growing out a flawless new nail from the inside.